In music production, mastering remains one of the most delicate steps, especially if you have plans of commercializing the music. There is a reason this is always reserved for the last. Mastering is carried out by professionals known as mastering engineers.
The sole purpose of mastering is for balancing the composite sonic elements of a stereo track/mix. This extra work of balancing helps optimize smooth playback across all playback systems and media formats.
Typically, mastering is done by using tools for equalization, limiting, compression, and stereo enhancement. These tools can either be virtual or physical. Just like every other step in music production, poor mastering can ruin a very nicely sung, recorded and mixed song.
Mastering is more like preparing the overall mix for final consumption. Mastering engineers go through several years of formal and informal training just to be able to carry out this very important task.
It takes more than just artistry to master a song; there is a great deal of physics and even some mathematics and chemistry in mastering music. Engineers can decide to master either inside or outside the box.
This can be based on several factors like skill set, availability of hardware or software, style of music, budget, etc. Regardless of whichever approach the mastering engineer chooses, it is always very important to choose the right tools—-else, you ruin a perfect song.
In this article, we will talk about mastering in the box and 10 amazing DAWs you can use to achieve a perfect master in the box. There are several DAWs in the market, but you just can’t use any to master your project or a client’s.
Regardless of your skill level, style of music, budget, or resources, we will discuss the 10 best DAWs for mastering that will work just fine for you. All you have to do is read on.
Table of Contents
10 Best DAWs for Mastering
There are plenty of DAW options available for mastering your tracks. Some of the best options include:
- Sequoia
- Wavelab Pro
- Pyramix
- Soundblade
- SawStudio
- FL Studio
- Ableton Live
- PreSonus Studio One Pro
- Avid Pro Tools
- Steinberg Cubase
Review of 10 Best DAWs for Mastering
Let’s take a more detailed look at each of these DAWs and see what are the standout features, and the limitations, for each when it comes to mastering your music.
Sequoia
When it comes to professional grade mastering there are few options as well-known and as widely used as Sequoia and Samplitude. Developed by Magix, these two platforms aim to resolve the problem of recording, mastering and distributing.
In particular, Sequoia focuses on resolving mastering issues at a wider scale, for a broader range of inputs. This specialized platform offers a range of features that you would be hard-pressed to find anywhere else.
Moreover, the sound engine that serves as the heart of the system for both Sequoia and Samplitude is the best in its class. Interestingly, Sequoia still comes on DVD along with its own dongle that is necessary for product activation.
Considering this is a $3000 program and requires excellent acoustics, hardware and skills to work right, this is not a simple DAW that you can lug around in your laptop. Moreover, if you have the money to invest in a solution like Sequoia you should also have the hardware and the technical abilities to make the most of this system.
In fact, the main things that make this platform stand out from the rest are the advanced features. On the surface, you will find a lot of features and tools that are common in other, much cheaper, DAWs as well.
However, as you dig deeper you will find things like an extremely advanced and powerful fade editor, DDP production abilities, 4-point cutting options, 12-channel surround, improved machine control, and 16-bit output for dithering.
Also, you are afforded the ability to create multiple user accounts that are password protected so your entire team to access the platform.
Overall, Samplitude can and does fulfil the needs of most mastering studios; however, if you want to provide top-shelf services and be able to cater to any kind of music that your client brings you, then Sequoia is the way to go.
Here is a great video covering some of the main highlights of Sequoia.
Sequoia is currently available for $2975.
| Pros | Cons |
| Unique feature set | Cluttered UI |
| Extremely expensive |
Wavelab Pro
From the team behind Cubase, there is another fantastic offering that is optimized for mastering audio; that is Wavelab. Wavelab is an incredibly powerful audio mastering platform developed by Steinberg.
It brings together various unique features, tools, parameters and controls that you would need to bring any kind of audio to a professional level. Through Wavelab Pro, you get access to a lot of different editing tools.
This means you can modify metadata for a lot of different media types including RIFF, ID3, AXML, CART and many more. The Audio Montage feature allows you to build a single CD with multiple tracks.
It also gives you the ability to apply different Effects to the individual tracks or you can apply them to the master channel to create a homogenous product. Through Audio Montage, you can also apply gaps to tracks, modify data, create fades and do many other things.
You can even export through DDP. Wavelab Pro also has a very useful feature known as Inpainting. This function allows you to replace noise in specific areas of your tracks with the right frequency to make it less hazy and sound more full and tight.
Wavelab Pro can do this by analyzing the frequencies in the area before and after the noisy area to understand how it can ‘paint’ over the noise.
Here is a nice introductory video to mastering audio in Wavelab Pro.
Currently, you can get Wavelab Pro for $499.
| Pros | Cons |
| Excellent quality | Capability isn’t as diverse as other options |
| Very good performance in all areas | It may be a bit limited for people working with different kinds of audio material |
Pyramix
This big difference in price is one of the things that makes the Pyramix ecosystem quite attractive to producers and recording studios. You don’t have to buy the entire system if you don’t want to.
Different sound engineers will have different needs and you can select a pack of Pyramix that best suits your needs. The Pyramix DAW is all about quality. No matter what feature or tool you look at in this system you will realize that it is built to pump out only the highest-quality audio.
For instance, Pyramix is one of the few DAWs that support Direct Stream Digital formats. In fact, it even supports DSD256 which can deliver an insane sample rate of 112,896 kHz.
Pyramix also offers other areas such as metadata authoring, high sample rate conversions, file type support, code editing, and others.
You also get a number of really good publishing features such as ISRC code editing, CD and Super-Audio CD authoring, and various album publishing features. You also get some powerful metering and editing tools.
Another highlight of this DAW is that it can support 384 recording tracks at a time. Combined with the interesting mastering tools that this system has, you can test your audio on any kind of speaker configuration you can think of and then really fine-tune the audio to optimize playback.
While this is a great DAW for anyone looking for amazing audio, it is not that easy to get a hang of. Be ready to invest some time in learning how this DAW works and how to understand its full potential.
Here is a detailed video about mastering with Pyramix.
Pyramix is available in a variety of different software packs. The most basic version is available for roughly $750 while the top-end variant will cost nearly $5000.
| Pros | Cons |
| Extremely high-quality features | Not beginner friendly at all; will be challenging to master even for seasoned engineers |
| Available in different packs so you can get exactly what you need and nothing redundant |
Soundblade
The top-of-the-line offering from Sonic Studio is the Soundblade HD; this is the version of the DAW that we will be focussing on in this review. Other versions include the SoundBlade SE and the Soundblade LE.
The Soundblade HD has been developed as a one-window solution for all your mastering needs. It comes with various tools and plugins that will help you optimize your audio and also has the capability to help you create fully mastered results.
From there, you can create any kind of DDP output that you need and even make changes to AAC, MP3, or files in other formats as you prefer. One of the standout features of Soundblade is its diverse support of plugins that make high-end mastering possible.
This platform supports both VST plugins as well as Audio Unit plugins which means you can install all your favourite tools to get things done. This is not to say that Soundblade itself doesn’t come with any quality software.
In fact, Soundblade has a very good quality EQ known as the Mastering EQ plugin featuring four bands of minimum phase shift equalizing.
Moreover, you also get dither plugins as standard with Soundblade which feature several quality algorithms that can help you design sound according to your needs.
Of course, this DAW also gets a full suite of denoising tools, spectral repair tools and a full kit loaded with all the most common mastering tools.
Here is a brief video about mastering audio in Soundblade.
Soundblade starts at $295 with the fully-loaded version going for $1495.
| Pros | Cons |
| Has an interface very similar to regular DAWs making it very easy to use | The workflow will be unusual for people who are new to it |
| Has all the features you will need for a beginner to moderate-level sound engineering |
Sawstudio
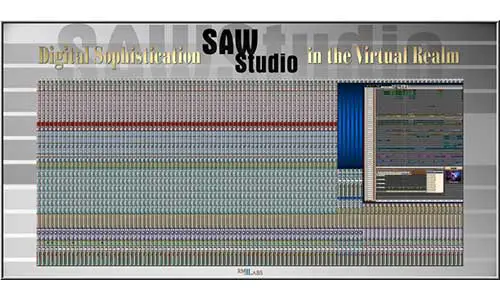
Sawstudio is one of those platforms that often has people divided. People either fall in love with this kind of DAW or it just isn’t for them. What makes Sawstudio from a visual and UI perspective is the overall look and feel of the environment.
It is designed to be reminiscent of the classic analogue machines that were used for mastering back in the 60s, 70s, and 80s.
Under that classic-looking UI lurks a very capable mastering platform that is completely optimized for the latest tasks and operations in sound engineering.
One of the great things about Sawstudio is the customizable interface. This way you can structure things according to what works for you and/or what suits your workflow best.
Moreover, the sound engine has also built a solid reputation for itself delivering quality output and reliable performance even when you are juggling multiple tracks and plugins simultaneously.
The audio engine can comfortably tolerate a 96 kHz sample conversion rate which is essential for high-quality mastering. Sawstudio not only supports third-party VST plugins but it’s also possible to ‘hotplug’ various plugins into Sawstudio.
This means that you won’t have to restart the program and you won’t even need to pause playback for the plugin to get started.
Here is a good video series covering everything you need to know about Sawstudio.
The basic version of Sawstudio starts at $300 while the fully-loaded version will cost $2500.
| Pros | Cons |
| Offers a real analogue experience through a digital workstation | Quite pricey; other options in this price bracket offer more features and abilities |
| Cross-platform compatibility means there are plenty of plugins and third-party software that you can use with this |
FL Studio
FL Studio is easily one of the most popular DAWs on the market and has been for several years now. This is largely because mainstream users are primarily interested in music production and mixing.
While FL Studio certainly performs exceptionally well in those areas it is also a very powerful tool for mastering audio.
When it comes to mastering, there are a range of tools and plugins that you can use to optimize your audio. One of the most commonly used plugins, and this is usually the starting point of a mastering process, is the Fruity Parametric EQ 2.
This helps to create more headroom in the audio for more upgrades and modifications later on. FL Studio also features two multiband compressor options that include the Fruity Multiband Compressor and Maximus. Power users may prefer Maximus as it does offer some advanced features as compared to the Fruity Compressor, such as inbuilt saturation controls, however, they are both great options depending on your needs and what you prefer to use.
You also have the Fruity Reverb 2 or the Fruity Convolver that you can use to add reverb to give the track a good sense of space—only in cases where that is necessary. To minimize clipping and also improve output volume you can use the Fruity Limiter.
Another unique feature of FL Studio is that it gives you the option to save various Mixer ‘states.’ Essentially, you are making pre-formed mixer settings that you can apply to other audio which can drastically speed up the process time for your work.
Here is a nice video discussing how to master audio in FL Studio.
You can get the entry-level FL Studio for $99 or the fully-loaded one for $499.
| Pros | Cons |
| Excellent MIDI processing and sequencing | Lacks some of the advanced features found in specialized mastering systems |
| Easy audio processing |
Ableton Live
While Ableton is a very popular name when it comes to DAWs, there are a few things that will either make Ableton the perfect platform for you to master music on, or your worst nightmare.
The main reason for this is the overall UI and the view of this DAW. Ableton features both a loop view (Session View) and a standard timeline view. For mastering, the timeline view tends to work best.
However, Ableton does have a range of features that will make this a great mastering platform for people that are using relatively light tracks and don’t need extremely advanced features like DDP output or multi-point cutting.
One of the most important plugins is Multiband Dynamics that you can use to cut your audio up into 3 distinct frequencies so you can master each one individually. You can put these frequencies into the Audio Effects Rack to get started with making changes.
Then there is the Maximizer that you can use for compression and also serves as a limiter. You also get Bass Body Booster which is fantastic for adding a bit more power to your bass frequency and making the entire track sound that much richer and fuller.
The Body Booster performs the same function as the Bass Body Booster, but it is designed for synths, leads and everything other than the bass in your audio.
If you want to add a bit of an edge to your leads and synths and make them sound crisper and brighter you can use the High Booster plugin. If you want to control the width of the stereo in your audio you can use the Imager.
These are some of the free plugins that you get with Ableton that can optimize every aspect of your audio. However, you can also use third-party options with this DAW and really customize your mastering.
Here is a good video covering how to master audio in Ableton Live.
Ableton is currently available at a discount. The basic version is available for $79 while the full suite is available for $599 which would otherwise be $99 and $799 respectively.
| Pros | Cons |
| Good selection of plugins that come as standard with the DAW | Standard plugins will only provide basic functions and for more advanced settings Ableton will not be able to get everything done |
PreSonus Studio One Pro
Studio One Pro has a unique angle on the mastering process. Unlike other DAWs, even dedicated mastering DAWs, Studio One Pro integrates the entire process on a single page known as the project page.
Studio One Pro does this, rather than having different parts of your mastering process spread out across the entire DAW.
While this is extremely convenient from an operational standpoint it is also important to examine what kinds of tools Studio One Pro has to perform the actual mastering work. In this regard, there are a few tools that definitely stand out to do the very basics of mastering.
These include the Compressor and ProEQ. As their names suggest these are the plugins you will be using to apply compression to the file and this will be the EQ you will be using to manage frequencies and carry out any other EQ-related work you need to.
As you dive a little deeper, you will find the Frequency Spectrum graph which gives you a visual representation of the entire frequency range. This is extremely helpful in the mastering process as opposed to just relying on what you hear.
On the projects page, you will also find a Peak Level Meter and an RMS Level Meter. Both of these will come in handy when you are adjusting the gain adjustments on the audio and they also make it a lot easier to resolve clipping issues.
You also get a K-meter with a variety of output settings to suit your needs or the genre that you are working on. You also get a Correlation Phase Meter to help resolve any phase issues you may be facing.
Studio One Pro also comes with a plugin called Binaural Pan which will help adjust the stereo settings on your audio.
Another powerful plugin to keep an eye out for is the MultiDynamics plugin. This is very useful for managing the compression on specific bands of frequencies and adding more life to specific areas of the sound.
Here is a good video covering how to master audio in Studio One Pro.
The basic version of Studio One is available for $99.95 while the Pro version will cost $279.97.
| Pros | Cons |
| Has an excellent project page that makes managing the entire process extremely easy | Has limited compatibility with audio hardware |
| Features some powerful and advanced features that you would expect to find on DAWs far more expensive | Can be a little daunting for new engineers |
Avid Pro Tools
Avid Pro Tools is one of the most widely used DAWs around today and it has been around for ages. In fact, the early versions of Avid Pro Tools have been around since mastering was done on analogue devices.
However, over the years, it has evolved to keep up with the latest developments in mastering technologies.
Today, Avid Pro Tools is a very capable platform even in the midst of competition from bigger, more expensive specialized DAWs that focus completely on mastering. However, there are a couple of things to keep in mind when using Pro Tools for mastering.
The main thing to keep in mind is that the workflow in Pro Tools is slightly different to what you may be used to in other DAWs. You are going to start off with starting a session and importing the file that you want to master.
You are then going to get started with the basic configuration such as setting the sample rate and bit depth and then moving into more detailed areas of the mixer to make the exact changes you need to create the sound you want.
Pro Tools comes with a wide variety of plugins that will help you get all this work done. Some of the most prominent native plugins include the following.
EQ-3 is the standard equalizer that you get with Pro Tools. This plugin makes it a whole lot easier to manage tonality. It gives you a 7-band EQ that you can play around with to see what works for you.
You also get the Dynamic-3 which is a bit of an all-in-one tool. It features a compressor, limiter, expander and a gate plugin to help you fine-tune the dynamic range of your audio. Maxim is a peak limiter that you can use to manage RMS and the overall sound of the audio.
If you need to apply Dither to your audio there is a plugin by the name of Dither for this very purpose. Mod Delay 3 and Reverb One are two plugins you can use to add effects like reverb and also widen/narrow the stereo output to give a bit more feel, cohesiveness and depth to the audio.
As you can see Pro Tools is equipped with pretty much everything you need for good mastering. However, keep in mind that you can also add some more third-party plugins if you need more functionality or if you are just more comfortable using those other apps.
Here is a good video covering the mastering capabilities of Pro Tools.
Currently, you can get Pro Tools for $29.99 monthly or annually for $299.99.
| Pros | Cons |
| Excellent performance even from stock plugins | Doesn’t support a high track count nor does it support a lot of input sources |
| Lots of resources are available for this DAW, whether you need additional plugins or you just need the information to better learn how to use this particular DAW |
Steinberg Cubase
We previously covered Wavelab Pro which is another option by Steinberg which specializes in mastering. However, this is not to say that Cubase is lacking in the mastering department.
In fact, For a similar price, you get very good performance in terms of mastering from Cubase, but more importantly, you also get an incredible music production DAW that can double up as your mastering studio.
Let’s look at what Cubase has to offer when it comes to mastering and how it all ties into this amazing DAW’s overall capability.
Compressing audio is one of the most basic tasks you need to do in mastering and Cubase has the Cubase Multiband Compressor for this task. This is a great plugin to use if you need to select specific frequency ranges and apply compression or expansion to them.
Working hand in hand with this plugin is Cubase EQ which you can use to balance the overall frequency spectrum and boost or tone-down specific ranges within the spectrum.
The Cubase Brickwall Limiter will help you handle the issue of clipping and will allow you to manage the overall loudness of the audio. You also get Cubase StereoEnhancer which will give you control over the depth of the sound and the angle of the stereo in the audio output.
Other plugins that you get with Cubase for mastering include the Limiter, Reverb, Maximizer, and many others. Overall you get nearly 20 plugins which are all directly tied to mastering.
Here is a great video about how to master in Cubase.
Cubase currently has a discount happening. The basic version is available for $59 while the top-end version is available for $349.40 which would otherwise be $99 and $579 respectively.
| Pros | Cons |
| Cubase is great and it has a very smooth user experiencen with a lot useful and top-quality mastering plugins | Sound quality is something that experts believe Cubase lacks. For some, the difference is negligible; for others, it is like night and day |
| If you are producing music in Cubase, it is extremely convenient to master it in the same DAW as well | You get a lot of capability but you need to know how to make the most of it; there is a learning curve to this DAW |
Difference Between Mixing and Mastering
To better understand what the difference is between mixing and mastering, it will be helpful to understand the objectives of these two processes.
With mixing, the objective is to take the individual tracks with a song (the drums, synths, vocals, strings, etc) and make sure they sound good collectively when played together.
This involves tweaking the frequency in different parts of the track, adding effects and filtering out unnecessary frequencies to give the song more emotion and make it sound and feel more like what the artist envisioned or what the artist felt when creating this song.
With mastering, the objective is to make sure the song sounds good in a musical, tonal and technical manner. It is correcting small issues in various areas of the song that may make it sound weak when played on different mediums. Secondly, it also involves structuring the album, creating metadata and giving the entire album the shape and structure it needs to be transformed into the streaming medium (online streaming, CDs, pieces of vinyl, etc).
Lastly, one of the big objectives of mastering is to make sure that the song sounds the same, or at least as consistent as possible, across different speaker systems.
Whether you are listening on headphones, in the car, at a party or on a home theatre system, the song should sound very similar in terms of its structure and audio quality. It should not only sound great on expensive headphones and terrible on car stereos.
Think of the individual elements of a song as ingredients of a cake. Mixing the ingredients in the right proportions and baking the cake so it achieves its desired size, look and taste, is like mixing the individual tracks in a song to give it its final structure.
Mastering the song is like finalizing the basket cake with toppings, decorations, candles, and a nice box so it’s ready for its client.
While the mastering doesn’t really change the structure of the ingredients (tracks) in the song, it helps to improve the overall look and also plays a role in the overall taste of the final product.
Difference Between Mastering in the Box and Mastering Outside the Box
In simple terms, mastering In The Box (ITB) solely inside of a computer through the use of A DAW. This way, external hardware are not being used, everything is done using a computer and a DAW.
Whereas mastering Outside The Box (OTB) is where a song is mastered using external hardware such as analogue compressors, limiters, etc.
Generally, ITB mastering results in a more transparent and ‘truer’ sound of the instruments and sounds used in the song while OTB mastering results in a warmer and more ‘natural’ representation of those elements.
However, these two styles of mastering also entail other differences in the overall process of mastering. Cost is a major difference.
ITB mastering is usually much cheaper than OTB mastering. This is because OTB requires a lot more hardware and you need a sound engineer who can properly use that hardware and then also master that signal through a DAW properly.
For ITB mastering, everything is done digitally using plugins. Typically, OTB also takes more time to do. With OTB mastering, changes in the track can require a completely new mastering.
One way is not necessarily better than the other. It all boils down to personal preference and what is more feasible for an artist or for a label to do. At the end of the day, the objective should be to get amazing sound.
Can you Use Any DAW for Mastering?
Yes, you could use any DAW for mastering, but whether you really should is debatable. Just like how you could technically eat one particular cereal for every single meal in the day, every single day, but whether you should or not is what is debatable.
The fact of the matter is that each DAW behaves a bit differently and even when using mastering hardware, components behave differently. Moreover, how you master your track, and the mastering chain that you use, will vary from person to person.
Ideally, you want a DAW that suits your workflow and has the capabilities that you need to make a song sound like how you think it sounds best.
Moreover, mastering through a DAW requires knowledge of the DAW itself as well as knowledge about the process of mastering.
If you are looking to progress as a sound engineer, or you are just an artist who wants to master their own song, your best bet will be to narrow your focus on one particular DAW and improve your sound mastering skills.
Once you have sound mastering dialled in, you can start experimenting with different DAWs to see how they respond to your particular style of mastering.
Once you find something that resonates with you, it’s time to really explore that DAW and see how you can take your skills to the next level.
What are the Best Mastering DAWs for Macbook Users?
If you are using a Mac, GarageBand is a free DAW you get with Mac devices and it can do wonders for your mastering needs as well. Other than that there are quite a few good options you can consider. These include:
What are the Best Mastering DAWs for Widows
Windows is still widely popular with sound engineers because it offers a lot of flexibility with hardware.
Software developers realize this and some of the best mastering platforms currently available were initially released for Windows systems. Some excellent options include the following:
- Sequoia
- Wavelab Pro
- Ableton
- FL Studio
- Pro Tools
Best Free DAWs for Mastering
If you are on a tight budget here are our top picks that cost absolutely no money and you can get started mastering audio with them right away:
What DAW Do Professionals Use?
Different producers have different preferences when it comes to choosing a mastering DAW. Some producers will choose a particular DAW for the kind of audio quality they get, others will want something that gives them access to the kinds of plugins they want.
Also, others still may choose a DAW that integrates well with the kind of hardware they prefer. Among the most popular DAWs for mastering are the following:
Pro Tools – This is one of the most widely used platforms in the music industry. A popular track made using this DAW is ‘Blinding Lights’ by The Weeknd.
Apple Logic Pro X – This is another very popular DAW. This platform was used to make ‘Shape of You’ by Ed Sheeran.
Steinberg Wavelab – Yet another very popular offering from the Steinberg pavilion. This DAW was used to make ‘Rolling in the Deep’ by Adele.
Conclusion
For some people, mastering is an art, for others, it is a science. However, whichever school of thought you belong to, mastering is only possible with the right hardware and the right DAW.
To really take your music to the next level through awesome mastering you will also need to master the DAW that you use and learn the intricacies of sound design and production.
With the options that we have discussed in this article, you have a number of extremely powerful tools that can help you out no matter what your needs are or what kind of music you are looking to create.
![Kaotica Eyeball vs Fatboy: ALL You Need to Know [2023]](https://performerlife.com/wp-content/uploads/2022/05/Kaotica-fatboy-211x150.jpg)

![What Happened To “Chief Keef”? [Everything to Know About This Rapper]](https://performerlife.com/wp-content/uploads/2022/05/Chief-Keef-211x150.jpg)