As a bass guitar player, there might come a time you will need to not just play live on stage but also record your bass. As a matter of fact, there are certain players who never play live on stage, they only record. This could be for several reasons.
Some record their own music while some record as remote session bass players. After the Covid 19 era, musicians were introduced to a whole new possibility of collaboration. Gone are those days when everyone had to be in the studio at the same time and place to create music.
Now, remote collaboration has changed a lot of things. Musicians can basically be in different countries and continents and create music that sounds as authentic and cohesive as if they were physically together.
This is where self-recording comes into play. The pianist can record a midi played to an agreed tempo and send over the drummer who would record the drum tracks from a different location but to the same [agreed] tempo.
This can go round to all musicians, including the bass player. In this era of digital recording, one of the most popular and reliable ways of recording bass guitar is DI (also known as Direct Injection).
Remember, there are other ways to record bass guitars. For instance, you can also mic the amp or cabinet with an appropriate microphone. However, DI recording still rocks on many records because of its very obvious advantages.
Because DI only involves you plugging your bass guitar directly into an audio interface, it gives a very clean, unaltered, and punchy sound that is a favourite of many genres and styles.
This kind of sound works very well for genres like pop, hip-hop, rock, and others. Some people incorporate a device known as a DI box into their DI recording chain. However, it is not a must to do this. With some audio interfaces, you don’t need to do that.
Regardless of what your bass recording needs are, choosing the right audio interface to record your bass guitar remains one of the most important decisions you will ever make in this regard.
All audio interfaces are not the same, even though some people might want you to believe so. The electronics and circuitry in an audio interface contribute a great deal to the resultant sound you will get from recording any instrument.
That being said, different audio interfaces come with different electronics and circuitries—or maybe, slightly different. In this article, we will look at the best audio interface you can lay your hands on for recording your bass guitar.
It doesn’t matter what you are recording for, your style of play, or your playing proficiency, there will be an audio interface for you. Just read on!
Table of Contents
Audio Interface for Bass Guitar
Some of the best options when it comes to audio interfaces for your bass guitar include:
- Apogee Jam+
- Universal Audio Apollo Twin MKII Solo
- Antelope Audio Zen Tour
- Steinberg UR-RT4
- Audient iD4 MKII
Review of Audio Interface for Bass Guitar
In this section, we will explore all these options in a bit more detail so you can see what will be the right fit for you.
Apogee Jam+
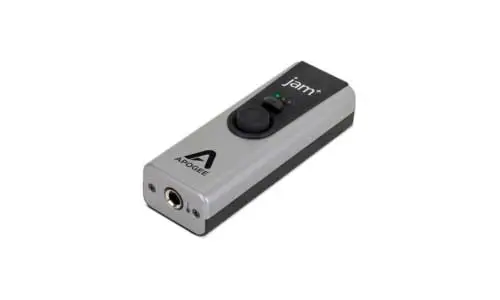
If you are just starting out with audio interface recording and you want something that is budget-friendly, easy to set up, and can also deliver some pretty good results, the Apogee Jam+ is worth your attention. This is about as simple as it gets when it comes to audio interfaces.
This can easily be used as a dedicated interface for the bass guitar in your audio setup since you have a single input, a couple of different outputs, some basic overdrive settings, and a very attractive price point.
Moreover, it also comes bundled with Positive Grid’s BIAS FX Jam software so all you need to add is your bass guitar. For bass guitars, this covers all the basic things you will want to have control over in terms of sound output.
This device can easily deliver a clean signal to the PC through the micro USB connector on the back or you can push a button and get some overdrive action going on.
Moreover, if you need to make further tweaks to the signals, you can always tinker with the settings in the Jam software and see what you like. This certainly will not give you pro-level results but that is not what it is designed for.
This is perfect for beginners, people who want a no-fuss solution or those that are looking for a travel-friendly interface that they can just throw in their bag and take with them. Plus, it connects to PC, iOS and Mac devices so you have plenty of flexibility in that sense too.
Here is a video review of the Apogee Jam+.
| Pros | Cons |
| Very affordable price | The bundle’s software is limited in capability |
| Small size, easy to carry | Not the highest-quality sound output |
| Versatile connectivity options |
Universal Audio Apollo Twin MKII Solo
Apollo is a very well-known name when it comes to audio interfaces. Apollo 8 and Apollo 16 are some very high-end products offered by Universal Audio that are a staple in many pro-level studios and production houses.
The MK2 Solo is a far more affordable and less pro-centric audio interface designed for musicians and engineers that want excellent audio quality but don’t have the budget or need for a full-blown professional system.
In terms of recording your bass guitar, perhaps, one of the most standout features is the Hi-Z input. This is something you will be hard-pressed to find in any product that costs less than a few thousand dollars.
The other very notable feature is the high-end DSP they have included with this product. Certainly, it is not as diverse as what you would find on the Apollo 8 but it is still a substantial step up from other products in this price range.
Lastly, you get a big array of features with the module as standard including distortion, preamps, compressor, limiter, reverb, and many others.
Not to mention that the quality of these plugins is also quite impressive and in line with what you would expect from a product that is part of the Apollo family.
Here is a detailed video of the Apollo Twin MK2 Solo.
| Pros | Cons |
| Excellent sound processing capabilities | Only Thunderbolt; no USB |
| High-resolution sound output | No reamplification option |
| Marshall Plexi and Ampeg SVT-VR ready |
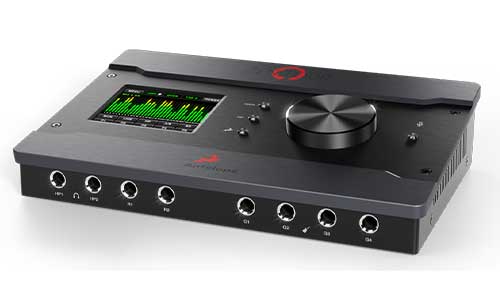
Antelope Audio Zen Tour
This is a fantastic interface not only for bass guitarists but for the entire band. Moreover, if you want to record more than one bass guitar at a time this device will be effective for that as well.
Upon first opening the package, you are greeted with an outstanding display, very solid build quality (with an all-metal casing), a very attractive colour display (with touch input) and a plethora of input and output options.
This interface can help you record through two mechanisms since it features 4 mic/line inputs as well as 4 Hi-Z inputs. If you want to get really high-quality results you can even opt for hybrid recording where you are using a mic input and a Hi-Z input to record your bass guitar.
This way you are getting an excellent quality signal and you still have room to modify it further. In terms of audio quality, this interface will facilitate 192kHz with a depth of 24-bit.
Perhaps, the only thing that some professionals may find problematic is the lack of MIDI I/O. However, it does make up for that with an extensive array of built-in DSP effects.
You get everything from cab models, and amps to a wide selection of classic studio gear emulations. Additionally, the device also brings a number of interesting features that you would want to explore.
This includes things like dual headphone outputs, dual preamp outputs, and several I/O. These I/Os are expandable via ADAT or S/PDIF. It also has talkback features and of course a very high-quality digital signal conversion.
Overall, an incredible package for semi-professional (or advanced casual) use. Here is a detailed video of the Zen Tour.
| Pros | Cons |
| Latency-free DSP FX | Lacks MIDI I/O |
| Excellent touchscreen interface | |
| More than enough I/O |
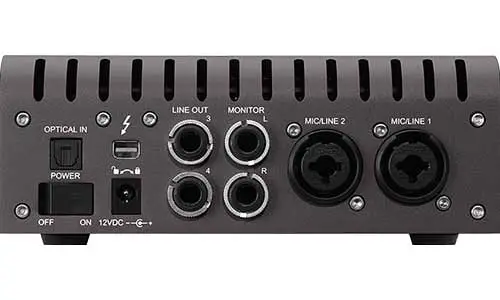
Steinberg UR-RT4
Steinberg is one of the best-known names when it comes to audio equipment. They have a track record for creating impeccable quality equipment and the same is true for the UR-RT4.
This particular interface can be a great addition to a professional studio or even for the casual bassist who wants a complete package. There is very little that you do not get with this product.
On the front, you will notice 4 inputs of which 2 are mic/line inputs while the other two are line/Hi-Z inputs. Overall you get a 6×4 I/O configuration and all this input signal will be processed at a sampling rate of 192kHz at 24-bit.
To further enhance the sound quality, you also get D-PRE preamps together with Rupert Neve Designs transformers. Lastly, Steinberg has also thrown in their highly regarded SSP2 DSP chip to ensure zero-latency FX monitoring.
On the front, you will also notice the Never Designs input switches for the RND transformers. All of this is packaged into a sturdy aluminium box which weighs over 5 pounds.
On the back of the device, you will find the main outputs (master stereo bus), line outputs, USB 2.0, MIDI I/O, two 48V switches, and a switched power input. This is an excellent option for guitarists and bassists alike due to its versatility, connectivity, and crystal-clear sound quality.
To get an idea of how different the sound is, just try using this device without the Neve Designs transformers turned on, and then compare it with the sound when the transformers are on. The difference is incredible.
Moreover, it integrates seamlessly with DAWs and recording applications from Steinberg and also other brands. This interface also connects seamlessly with a lot of hardware, so if you want versatility in that sense, this is a great option to explore.
Here is a nice video covering the UR-RT range from Steinberg.
| Pros | Cons |
| Neve Transformers take sound quality to the next level | You will be limited in plugin options due to the DSP |
| High-quality inbuilt DSP | Even with all these features, it is quite pricey |
| Excellent build quality | |
| Very versatile and compatible with other software and hardware |
Audient iD4 MKII
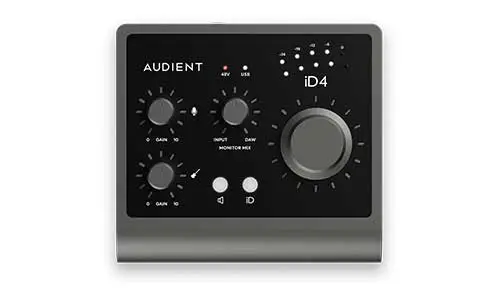
If you have ever been in the market for pro audio equipment, Audient is yet another name you will come across. Like Apollo Twin from Universal Audio, the iD4 MK2 from Audient is a more enthusiast-focused offering.
It is at an affordable price but you get some excellent audio recording quality and capabilities. Here is why. If you are recording through mics you get iD4 8024 Class A preamps in the mic level input.
These are the same preamps you will find in the flagship models from Audient. If you prefer a DI approach you get Hi-Z inputs. Overall, you have 2-in and 2-out capabilities with this device and a sampling rate of 96 kHz at 24-bit.
On the back of this unit, you get speaker-level outputs from powered monitors and on the front you have both ¼ inch and ⅛ inch for headphones. Both these outputs can be used simultaneously.
On the top panel, you get gain controls, output monitoring and a large volume encoder. Another interesting feature is that the iD button can also be used to engage the encoder mode after which you can use the main knob to control various plugin parameters in the DAW.
This is extremely helpful when you are recording live and you just need to adjust something small while playing. Overall, it’s really well built with an aluminium casing, the knobs and buttons feel quite sturdy and the sound output is also quite good.
Just be sure to use USB 3.0 or USB Type-C to give the unit the power it needs to power the full 48V.
Here is a good video showcasing the Audient iD4 MK2.
| Pros | Cons |
| Excellent clean gain from the Audient preamp | No MIDI I/O |
| Very well built | |
| Ergonomic design and interesting DAW integration features | |
| Easy hardware monitoring |
Can you Use Any Audio Interface to Record Bass?
Yes and no.
This is because audio recording can be done in a few different ways and depending on what your objective is from the recording there are several factors that you may want to consider.
Also, the way you do recording will be influenced by the kind of hardware and software you have at your disposal. There are some instances where you cannot record with any given audio interface.
For instance, if you have a fantastic interface such as the MOTU M6 but you don’t have any mic, you can’t record a bass guitar through that device since the MOTU M6 doesn’t have any bass/high impedance inputs.
But if you had no preference in the mic vs DI area, you could use any device. Again, the kind of quality you would get from such recording and how easy it will be to use that recording for further processing can vary significantly.
When selecting an audio interface for audio recording there are a few critical things that you want to evaluate.
Input – This is very obvious but many people end up buying something based purely on audio processing capabilities rather than overall functionality. If you want to be using DI recording then you need a device with the appropriate input options such as Hi-Z or a standard ¼ inch input.
Preamp Quality – Bass guitars can generate some very low-frequency sounds. When you are playing a bass riff you are oscillating between low frequencies and these can be tough to pick up and reproduce.
This is why it is crucial that your interface has a quality preamp that can pick up and reproduce these low frequencies with clarity.
Sample Rate and Bit Depth – The other two factors that will impact sound quality directly are sample rate and bit depth. As a rule of thumb, you don’t want to get anything that offers less than 24 bits of depth or a sample rate of less than 48kHz.
DAW Compatibility – Again, something quite obvious but many tend to overlook it. If you already have a DAW, then you need something that will work with that DAW. Alternatively, many interfaces come with their own specialized recording software.
In that case, just make sure the bundled software is suitable for your needs. Otherwise, look for interfaces that will work with your preferred DAW or recording software.
How to Get an Absolutely Amazing Bass Recording from Your Audio Interface
Getting the right interface and getting a good bass guitar are the first two components for quality recording. However, there are a number of other things you can do to improve the quality of the output from this stage onwards.
Here are some of the most important things you should consider to help you get the best possible results.
Tips For DI Recording
If you want to record specifically through direct injection, these are some things that will help.
Latency – Guitarists and bassists alike usually need to be able to hear their instrument in real-time to get a feel for the music and make adjustments accordingly. This is where latency comes in.
Ideally, you want as little latency as possible so that there is minimal delay between the string being played and the sound coming out of the speaker. Here, you also want to consider whether you want to use an external amplifier or the preamp on the interface itself.
Again, this will take some testing to see what works best for your situation to give you the least amount of latency.
Bass Guitar Type – Professional producers and artists alike have different guitars for different purposes. The timbre of the sound created from one bass guitar can sound extremely different from another bass guitar.
Ideally, you want a bass guitar that will produce the quality of sound that suits the genre of the overall song. Some guitars will have a punchy, thick sound, others will have less of a hum and a more ‘clean’ sound.
Others will be more ‘electric’ and will work better where you need distortion on the bass. Similarly, fretted and fretless bass guitars are also very different in their sound. Set yourself up for success by getting the right kind of guitar.
Interface Effects – Most interfaces will give you some effect options. You will see even more effects in the DAW you are using and alternatively, you can also pedals for getting the kind of effects you want.
Using these effects will impact the quality of the sound you get on your computer. Here you want to experiment with different effect options to see what works best on your gear and what suits your recording needs best.
There is no perfect solution; it’s all about adjusting for what gives you the best results.
Other Considerations
Here are a few more things you want to take care of to further improve your DI recordings.
Optimize Gain Staging – To capture a clean, strong signal you need to have the right amount of gain. However, too much can lead to clipping in your recording. Start off with a minimal amount of gain and gradually adjust it to the desired level.
Also, make sure you double-check once you have set effects, pedals, and other variables since those changes can impact gain.
Cabling – Getting good quality cables will ensure you are getting a clean signal with low noise and minimal interference. This is particularly important if you are using long cables and covering a lot of distance.
Dedicated DI Box – Today, most interfaces come with dedicated DI inputs of some kind. However, some people still prefer the sound quality o a dedicated DI box.
This can be a good option to look into if your current interface is mic/line only. Or you could just try it out for the sound experience.
External Processors – DAWs and interfaces both have a number of effect settings. However, using physical external processors like pitch shift pedals, compressors and others, can have a unique impact on the sound.
Consider adding these to your chain to see how they impact sound. Also, they can take some processing load off the PC which can help with DAW performance.
Virtual Effects – Consider exploring the compression and EQ setting in your DAW or on the interface itself. These will have a substantial impact on the quality of the sound that you record.
If you don’t see these settings on your DAW you can get third-party plugins to help you out. Make sure you are using good-quality plugins in your DAW.
Monitoring – Use a set of high-quality headphones to hear how the music sounds. Using monitor speakers is another good option. However, headphones tend to be more sensitive, they deliver more accurate sound and you can better understand the stereo nature of the sound.
PC Hardware – The PC hardware you use will make a big difference. The processor, ram, and especially the sound card will have the most pronounced impact.
Having a weaker PC will also result in clipping in the sound output and it will generally have more lag in its performance. If your PC hardware is not able to keep up you can look into getting less processor-heavy DAWs.
Making Sure your Audio Interface is Compatible with your Computer
Compatibility with your PC is the first thing that you should look for in an audio interface.
However, there are quite a few things that can impact the compatibility of the two machines. Here is a list of all the key areas where compatibility conflicts may arise along with what you need to look for to ensure seamless connectivity.
System Requirements – All DAWs and audio interfaces have minimum system requirements. This means your PC/other device you are using should meet these requirements.
This can include things like processor type, amount of RAM, amount of available space on the hard drive, soundcard requirements or even a certain chipset requirement.
The more advanced the audio interface is the more stringent these requirements will typically be. As a general rule of thumb, if you are using a PC that is more than 5 years old, double-check the system requirements.
Connectivity – This can be a real problem if you get an interface which physically cannot connect to your PC. Generally, audio interfaces will connect through PCIe, Firewire, USB, or Thunderbolt.
However, there are many different types of connections within each of these categories. For instance, USB 2.0 or USB 3.0 or USB type C. In some cases, you may be able to get adapters but this will usually compromise signal quality.
You want a seamless connection where possible, so make sure you have the same ports on both devices.
Software Compatibility – This relates to the operating system of the PC. The most widely used options include Windows, MacOS and Linux. You want to make sure that your audio interface will work with the operating system you are using.
Again, if you are using an older system you want to make sure that the version of the operating system you have is compatible with the audio interface. You may have Windows 7 while the audio interface is only compatible with Windows 10 and later.
Drivers and Firmware – While most devices are simply plug-and-play solutions, you still need to make sure you have the right drivers and updated firmware for peak performance.
Sometimes, an audio interface will work with the standard audio drivers on your computer but performance and functionality may be limited if it doesn’t have the right drivers. Also, have your computer set to auto-update the firmware on the interface.
This will ensure you are getting the latest software and the best performance from the device. If you can take care of these different aspects of connectivity you should have no problems in using an audio interface of your choice.
What Audio Interface Do Professionals Use to Record Bass?
The equipment used by industry professionals can vary a lot depending on the recording setup, project requirements and even personal preferences.
Here are a few examples of some popular bassists and some well-known producers along with the kind of audio interfaces they used to record their music.
Tony Levin – Levin is a well-known bassist popularly known for his work with King Crimson, Peter Gabriel and many others. He has used the MOTU 828 audio interface extensively for recording many projects he has worked on.
Larry Graham – Graham is a renowned bassist who has played with Sly, The Family Stone and also his own band The Graham Central Station. Graham was known for using the Universal Audio Apollo Twin audio interface for his recordings.
Jacquire King – King is a grammy winning producer and engineer. He has worked with artists including, but not limited to, Tom Waits and Kings of Leon.
He is known for being a big user of the Apollo series from Universal Audio. Some of his most commonly used devices include the Apollo 8 and the Apollo X.
Pino Palladino – Palladino is another very well-known bassist who has worked with Adele, John Mayer, D’Angelo and many others. He usually uses the Apogee Duet audio interface for his work.
Marcus Miller – Miller is another very well-known producer, composer and bassist. He has collaborated with Herbie Hancock, Miles Davis and many other very well-known artists. He is known to use the Apogee Ensemble Thunderbolt for a lot of his work.
Conclusion
When it comes to recording bass and selecting a good audio interface, there is no one-size-fits-all solution. It’s about seeing what works for your particular needs.
Also, it is about what will work with your available hardware and what kind of sound and workflow you prefer as a bassist or a producer. If you are just getting started with audio recording, get yourself a basic interface that has good-quality sound.
Buying the biggest and most expensive will not ensure you get the best result. Over time, as you understand the process and develop a taste for recording you can look into other options that better satisfy your needs.
![Kaotica Eyeball vs Fatboy: ALL You Need to Know [2023]](https://performerlife.com/wp-content/uploads/2022/05/Kaotica-fatboy-211x150.jpg)

![What Happened To “Chief Keef”? [Everything to Know About This Rapper]](https://performerlife.com/wp-content/uploads/2022/05/Chief-Keef-211x150.jpg)