Maybe you record music or podcasts, and now you’re growing. You no longer work on your laptop and have gear, but you’re fed up with constantly getting behind your rig to change wires and channels.
Well, this is where patch bay comes in. You might ask, what is a patch bay? Well, let me explain.
Table of Contents
What is a Patchbay?
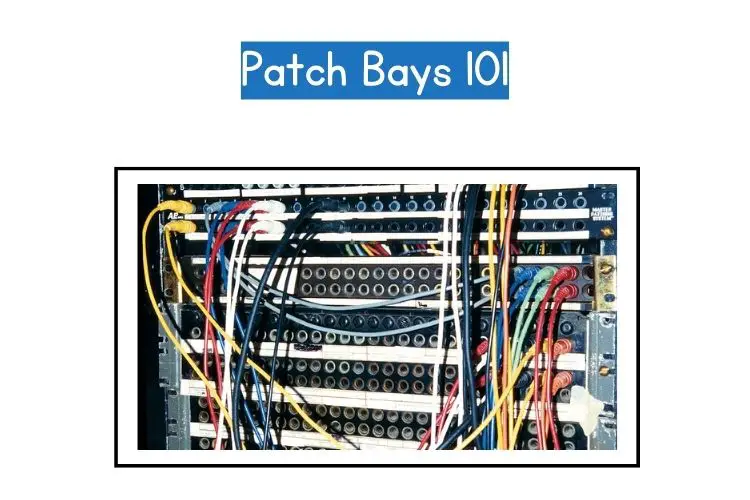
Your outboard equipment’s inputs and outputs are all connected into one central hub by an audio ‘Patchbay.’ This makes it possible to switch from one device to another without having to move behind a rack of equipment.
Even though it requires preparation and time, using a patch bay is simple once everything is connected. You’re good to go if you know how to use your equipment.
In easy words, you might have seen those movies that, in the old days, there was this room with a wall filled with cables, and the assistant sitting over there would route a call from one channel to another. Patch bay is the same thing but used for your, let’s say, recording equipment.
How to Set Up and Use a Patch Bay?
You can design your personalized audio signal routing using a patch bay. You can build bespoke processing chains by connecting the ports on the front of the patch bay by means of patch bay cables after attaching your microphones, outboard equipment, and audio interface to the patch bay’s rear.
Signal Flow
An audio engineer needs to comprehend how signals go through the patch bay. There are six groups in the signal flow. These organizations capture the vocalists’ and musicians’ sounds on tape.
Your digital audio workstation receives the signal from the patch bay console after that. The signal eventually returns through the speakers.
Best Audio Patch Bay Cables
You can calculate the quantity and length of patch cables you’ll need after you have a plan. The most popular patch cable types supported by patch bays are 14″ TRS cables and TT Type TRS cables.
Determining if your patch bay and requests are TRS (balanced, stereo) or TS is essential (unbalanced, mono).
You can only pass a correctly balanced signal if you have TRS patch cords and a TRS patch bay. Let’s talk about some of the connection types and cables:
Front Panel Connections:
¼” TRS
The type of patch bays most frequently found in home studios is 1/4′′ TRS. The tip ring sleeve is referred to as TRS.
The balanced line level signals that originate from the output of mic preamps, outboard equipment, or electronics like synthesizers, samplers, and drum machines can be carried by TRS cables.
XLR
Simple, single-point setups with a female input on the front panel and a male output on the back panel are typical of XLR patch bays.
Single XLR connections are typically relocated to more useful locations for direct patching using these bays.
TT (Tiny Telephone)
Bantam or tiny telephone cables enables up to 96 distinct connection points to be contained in a single patch bay. These are the typical connectors used on studio patch bays of the highest caliber.
Unless you have a rack full of expensive equipment, this patch bay type is likely overkill for a home studio because individual TT cables might be costly.
Back panel connections:
DB-25
DB25 connections seem like the ones used to connect to old desktop computers because they are.
These connectors can transport up to 8 balanced signals when used for audio. In order to fit the most connections into the smallest amount of space, they are typically utilized in TT patch bays.
To connect to equipment that has a 14″ TRS or XLR input, you need DB25 snakes with the corresponding connector ends.
¼” TRS
For input and output, typical consumer patch bays use 14″ TRS. This lowers the cost and increases the accessibility of connectivity for home studios.
EDAC: Pro
TT patch bays may include the high-density connector type EDAC.
Patch Bay Basics And Normalizing:
The audio signal’s path through the patch bay is all that concern when it comes to normalizing. Unless a patch cable is utilized, outputs and inputs are connected to one another inside the patch bay.
Knowing when to use one configuration over another will depend on your workflow. Therefore, before installing your equipment, consider this and other aspects.
Full-Normal Patch Bay vs. Half-Normal Patch Bay:
If you want me to give you the simplest definition which can differentiate between Full-normal patch bay and Half-normal patch bay, then:
In a Full-normal Patch bay, the connections between the rear panels are broken when a front panel connection is created.
While in a Half-normal Patch bay, the connections on the rear panel of a half-normal bay are linked; a connection to the top row of the front panel does not break the link, but a connection to the lower row does.
Extensively, a Full-normal patch bay configuration eliminates the requirement for patch wires on the front by placing the appropriate input immediately beneath each output. When a patch cable is linked to the output on the front, the input connection is broken, and the signal only travels through the patch cable.
Half-normal patch bays send the output on the rear through the equivalent input below them, much like full-normal patch bays do. That link is not necessarily severed with the use of a patch cable, unlike the full-normal patch bay.
The link will be damaged, and the input apparatus will only receive the signal connected via the patch cable when you insert a patch cable into the input jack in the bottom row.
The first link is not disrupted, though, when a patch cable is linked to the top row (the output jack).
A replica of the signal travels through the patch cable as the original signal continues to the normalled input.
This is useful in a dry/wet recording, where other elements fully influence one signal in the signal chain, and the other is not.
Patch Bay Tips
Once you understand the fundamentals of how audio patch bays fit into your studio setup, you may get creative with how you route your audio.
You may speed up your productivity and reduce stress by using some of the patch bay tips given below:
Create A Patch Bay Diagram
The ideal way to set up your patch bay is to determine how many inputs and outputs you’ll need, what sort of normalizing you’ll need, and then draw out a wiring diagram so you can see how your connections will be formed.
You may also download free blank templates from some patch bay manufacturers to help you see and organize your signal routing.
Cables and Labels
Give the patch bay a name. You can stick labels underneath the patch bay’s front panel to make it easier for you to recall where your equipment has been plugged in.
However, if you don’t have much equipment, you can decide not to write it down at all, or you might decide to write it down on a piece of paper.
Double-Check Phantom Power
Phantom Power refers to the method of providing DC (Direct Current) to microphones with active electronics that need electricity to operate.
All condenser microphones have active circuitry and need phantom power, including the Shure KSM line.
Microphones are the only devices that generally need phantom power. Use a balanced patch bay when patching microphones; otherwise, the microphones won’t function.
When you connect devices while phantom power is active, your speakers may be damaged by a loud pop. Before using phantom power, attach your equipment, and make sure to turn it off before disconnecting it.
Manage Your Patch Cables
You can calculate how many patch cables and how long you’ll need after you have a plan. The most common patch cable types supported by patch bays are 14″ TRS and TT Type TRS cables.
Verify whether the patch bay and your requirements are TRS (balanced, stereo) or TS (unbalanced, mono).
If you have a TRS patch bay, TRS patch cords are necessary; otherwise, a true balanced signal cannot be transferred.
Advantages Of Using a Patchbay
Using a patch bay has two main advantages. The first benefit is that you can easily design customized signal routings without fiddling with cables behind your rig.
The second benefit is that it keeps your hardware from deteriorating.
The only cables and jacks that degrade are the patch cables and the jacks in the patch bay itself, which are both much less expensive to switch than the cables used to attach equipment to the behind of your patch bay and the jacks in your hardware parts.
Top 5 Patch bays for Home Studio
If you have a personalized home studio and you like to record at home without any kind of hassle, then let me give you a few choices for Patch bays for the home studio:
- Neutrik NYS-SPP-L1
- ART TPatch
- ART P16
- Samson S-Patch Plus
- Redco TT/DB25 96pt
Frequently Asked Questions
In a complex studio, a patch bay is a useful piece of equipment; if you find yourself wishing you had spent less time connecting various devices, you could probably use one.
They are a very practical and affordable method to use your equipment. Although not necessary, you might find that employing one facilitates a more efficient workflow.
It doesn’t have to be difficult to map out every piece of equipment in your studio, even if it looks like a huge task.
Then you’ll need to understand how they operate and which one is best for you.
But if you’ve read this far, you’ll surely have all the information you need to begin using patch bays.

![HERE’S What Happened to the Soul Singer Al Green [2023 Update]](https://performerlife.com/wp-content/uploads/2023/04/what-happened-to-al-green-211x150.jpg)