Across all genres and styles of music, sampling has always been an integral part of music creation and composition. However, the art of sampling is a lot more prevalent in some genres than in others.
There are so many reasons why musicians and music producers sample—talking about the reasons and even the legalities behind the art of sampling in music production will be beyond the scope of this article.
From the inception of sampling, producers have always looked for ways to ease up the process. They have always searched for easier ways to sample; they have gone from using hardware samplers like the AKAI MPC to surfing online directories like LoopCloud to using DAWs.
Sampling has always been and will remain a fun music production process that should involve as minimal stress as possible. It is essential to keep it easy and fun in order for creativity to thrive.
In modern music production, one of the easiest ways to sample is through the use of DAWs. Many modern producers are shifting from using actual hardware samplers. This makes the work easier and also a lot cheaper.
Hardware can be expensive. Why bother buying it when you already have a DAW that you can import in samples and chop them up? However, we are not saying that sampling in DAWs will somehow replace the traditional method of using hardware like the AKAI Pro MPC or Native Instruments Maschine MK3.
In this article, we will discuss in-depth, 10 amazing DAWs that you can use for sampling as a music producer, musician, or beatmaker. Regardless of your level of proficiency or musical style, there will be a DAW that fits your need—just read on!
Table of Contents
10 Best DAWs For Sampling
- Ableton Live
- Image-Line FL Studio
- Avid Pro Tools
- Acoustica Mixcraft
- Bitwig Studio
- Reason Studios Reason
- PreSonus Studio One
- Steinberg Cubase
- Tracktion Waveform
- Reaper 6
Review of 10 Best DAWs For Sampling
Sampling is one feature that all these DAWs share. However, to understand how easy it is to sample through these different DAWs, and to find out which one is right for you, it’s important to look at the abilities of the overall DAW and how exactly it executes sampling tasks.
In this section, we review the top 10 DAW for sampling and their overall performance to see what will suit your workflow the best.
Ableton Live
The Lite version of Live starts at $99 with the complete studio going for $749. Abletons’ Live is a well-known and highly regarded DAW that has been serving professional and amateur music producers alike for over 20 years.
When it comes to sampling the Live interface makes use of the Sampler plugin to manage samples. Whether you want to import existing samples and modify them further or record live samples and tweak them for your project you can do this through the Sampler interface.
More importantly, Live has a range of features that can be used in tandem with the Sampler interface to help make even more changes to your sample and modify it in different ways.
Live can connect to your keyboard and use that as a MIDI interface to control various aspects of the DAW (and your sample) or you could connect a dedicated MIDI controller and use that.
What’s great about Ableton is that it allows you to make adjustments like pitch, tempo, warping, and many others, in a couple of different ways. On one hand, you have dedicated controls that can tune specific parameters of a sound.
Alternatively, you could look into the manual control section where you adjust these things much like you would with a traditional sampler. Another key aspect of the Live DAW is the Drum Rack.
This acts much like a drum pad machine but it gives you far more control over the drum pad (through the Sampler interface) and you can adjust the amount of pads on the Drum Rack according to what you need.
Here is a video covering how to do samples in Ableton Live:
| Pros | Cons |
| Plenty of automation options | No pitch correction tool |
| Clip-based live performance and easy workflow management | No notation view |
| Good interface | |
| Good selection of packs available as standard |
Image-Line FL Studio
Currently, FL Studio is available for $99 for the basic version whereas the fully loaded suite is for $499. When you think of DAWs, oftentimes, FL Studio has to be one of the first to come to mind.
It has been incredibly popular over the past several years and nearly all producers have experimented with FL Studio at some point in time or another. In fact, a lot of professional producers use FL Studio for a lot of the work that they do.
FL Studio is a robust DAW and when it comes to sampling it is incredibly capable as well. The main thing that stands out in terms of sampling in FL Studio is that there are a variety of ways you can go about sampling in this DAW.
Each of those paths has its own advantages and limitations but it’s always helpful to know that there is another approach to sampling that you can take within the same DAW if a certain approach is meeting your needs.
FL Studio is loaded with three main plugins that can be used for sampling. These include Edison, SliceX and Fruity Slicer.
Fruity Slicer is the most basic of the 3 plugins and it comes as standard even with the basic version of FL Studio. This plugin is great for people who just need to import a sound, make minor adjustments, and add it to the mixer, piano roll or channel rack.
If you need slightly advanced functions in your sampling plugin then the best bet will be SliceX. This offers all the major tweaking functions you would need in a sampler and also allows you to integrate samples from a few different sources.
Edison is a VST plugin that is native to FL Studio and offers a lot of functions that are unique to this particular DAW. Edison is a great option for producers who use FL Studio extensively and understand how its different capabilities will tie into different functionalities of FL Studio.
Also, FL Studio gives you the option to directly record audio into the DAW and make a sample out of it from there.
You can also import sound samples separately and modify them with the samplers or different tools in FL Studio. It also has inbuilt functions where you can chop and slice existing audio samples to rework them for your task.
Here is a video covering how to sample in Fl Studio:
| Pros | Cons |
| Plenty of options when it comes to working with samples and a lot of advanced functionality to make changes to the samples | The interface is very crowded and can be hard to find things |
| Not as expensive as other options | Features on the basic version of the DAW are quite limited |
| Comes with a decent sample library |
Avid Pro Tools
Pro Tools is available on a subscription basis. You can either get it on an annual basis for $299 per year or a monthly basis for $29 per month.
Pro Tools by Avid is another name that is quite popular in music production and it is definitely a very popular platform with Macbook users. One of the things that make Pro Tools so powerful and diverse is its ability to integrate third-party applications.
Moreover, there are a number of things that Pro Tools is able to do within its basic interface without requiring additional plugins; something that can be confusing for people that are more familiar with other DAWs.
When it comes to sampling both these things are true for Pro Tools. It can do sampling in a variety of ways, it can use third-party plugins for sampling, and it also makes wave modifications much easier as they are present right on the editor page.
If you have a sample that is ready to go and just needs a bit of refining the edit page alone should be enough. If you zoom in on the sound you will notice the waveform of the sound is displayed below. Here you can directly customize the wave and tweak the sound to your liking.
Pro Tools also gives you the ability to record live samples and it’s also possible to import recorded samples from other mediums as well. Once they are into Pro Tools you can place it into the audio track and make changes as necessary.
Pro Tools comes with a dedicated built-in sampler, Boom. This is a great tool that you can use for everything from chopping and slicing to adding effects and modifying modulations of the sound.
Structure Free sampler is an add-on you can use that is free of cost. There are also some very popular paid samplers such as Battery that Pro Tools users use.
Alternatively, if you have some other sampler that you enjoy, maybe with another DAW, just see if it can work with Pro Tools. You can import that into Pro Tools and use that as well.
Here is a video that gives a quick overview of how sampling can be done in Pro Tools:
| Pros | Cons |
| Supports third-party sampler | Limited functionality on the basic version |
| Capabilities are expandable through third-party tools |
Acoustica Mixcraft
The Acoustica Pro Studio is priced at $199 but is currently available for $149 from the official website.
The Acoustica Mixcraft is a great DAW if you need something that is simple and straight to the point. Unlike other popular DAWs, Mixcraft is available as a recording-only version or you can get the full suite.
If you are looking to just record samples and make minor changes to them and possibly layer a few tracks together in a mixer then the recorder will work great.
However, if you want to work with stock/third-party sounds and get access to everything you need to really produce tracks, then the Pro Studio will be a better option.
Mixcraft gives you two ways to create and modify samples. This is done through two plugins known as the Omni Sampler and the Alpha Sampler. Both these samplers have very similar capabilities but there is one major difference.
The Omni Sampler gives you access to a grid of 16 pads. In fact, you get multiple 16-pad grids in the Omni Sampler essentially giving you access to more than 50 individual pads that you can use simultaneously.
At the same time, you also get access to all the sound modulation controls you would expect from a sampler including reverb, resonance, pan, release, and many others.
The Alpha Sampler gives you all the same controls but can only load one sound at a time as it doesn’t have multiple pads. This is going to be quite useful if you have only a single sound of a single note and you want to map that out onto your entire keyboard.
Here is a video covering how to sample in Mixcraft:
| Pros | Cons |
| Gives you all the controls you would want or need from a good sampler | Design isn’t very intuitive |
| Some controls have a different name in the Mixcraft DAW which can be a bit confusing until you get used to it |
Bitwig Studio
You can purchase the basic version of Bitwig Studio for $99 or the complete Studio for $399.
When it comes to sampling, Bitwig is a bit different from other DAWs that you may have used. Bitwig comes with a built-in sampler (even in the basic version) which can be used for a variety of sampling tasks.
The Bitwig Sampler is what you will be using to import samples into the DAW to further process. However, one major difference is that you cannot record directly from the sampler. Rather, you will have to use the main recording tool in Bitwig.
This tool is known as the Global Recording function in the DAW. You can use it to record audio that you can then use an audio clip in the Sampler to make changes to.
With the Sampler, you can also map the sound onto your keyboard, MIDI controller or any other interface that you may be using. You can also tweak the start and end points, and manage crossfade settings and loop points.
You can also use the sampler to apply a range of modulations including LFOs, envelopes and step sequencers. The Sampler will also be useful in making modifications to the sample such as cropping, filter cutoff, pitch control and others.
Lastly, you can export the modified samples as WAV files and use them in your BItwig projects. Here is a video in a 6-part series about how to sample in Bitwig Studio:
| Pros | Cons |
| A comprehensive one-window solution for sampling | Controls can be hard to get a hang of |
| Available in both packages of Bitwig | The interface is not as clean when compared to other DAWs |
Reason Studios Reason
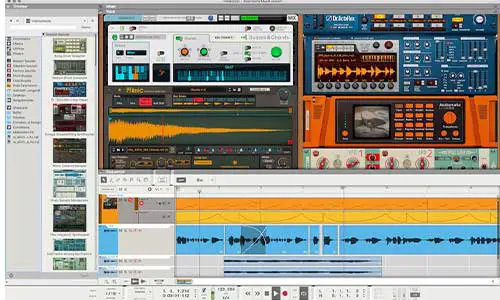
Reason is currently available at a discount of $299. The full price is $499. Among the different DAWs and particularly in terms of how they manage sampling, Reason is a DAW that has been extremely proactive about how it manages sampling.
If you have been a user of Reason in the past, or are even currently just exploring this particular DAW, you will notice that there are quite a few ways to create samples.
Over the years, Reason has continuously updated how it goes about sampling to stay in line with what professionals are actually doing and how they are tackling the process of sample creation and sample manipulation.
Plugins that you will find within Reason such as NN-XT, NN19, Kong, Sequencer, and many others, can all perform some things that you would want from a good sampler. However, most recently Reason has developed a plugin called Mimic.
This is by far the most advanced sampling plugin in Reason and one of the best sampling plugins in general for any DAW on the market. Through Mimic, you can turn any kind of sound file into a musical element.
It has all the sound modulation, automation and modification capabilities that you could want, plus, it has the ability to integrate those sounds with different input mediums and then some more controls to handle those input devices.
Here is a video covering how you can get started with Mimic, the sampler in Reason:
| Pros | Cons |
| A very advanced sampling plugin in the form of Mimic | There is a learning curve to the process that can be daunting for newbies |
| Multiple ways to go about sampling depending in your particular needs and your understanding of the platform |
PreSonus Studio One
You can buy the PreSonus Sphere membership for $14.95 per month or $164.95 annually, you can get the PreSonus Studio One Artist for $99.95 or you can get the Studio One Professional for $399.95.
If you have used Studio One in the past, you will probably be familiar with the SampleOne sampler. In the latest version of Studio One, the same sampler has received a few upgrades, and some new features and has been renamed to Sampleone XT.
It has some very useful features such as automatic time-stretching, several effects you can apply to the sample and a wide selection of sound engineering tools you can use to really customize and personalize your sample.
Other than that, the Sampleone XT has a few very interesting features that are enhanced from previous versions. These include wave controls, envelopes, mapping features and recording functions.
Through these features, you can make nearly any kind of adjustment you want to make to your sample and also do everything from the same sampler rather than having to juggle your sample through different plugins.
Here is a great video covering Sampleone XT:
| Pros | Cons |
| Advanced feature set that is great for newbies and pros alike | Not the easiest of interfaces to master especially for new producers |
| One-window solution for everything |
Steinberg Cubase
Currently, Cubase is running a discount and you can get the starter pack for $59.99 and the Pro pack for $347.99 which would otherwise be $99.99 and $579.99 respectively.
Cubase is a very well-known DAW in the music production space and when it comes to sampling it stands up to its name. With Cubase 9, and onwards, Cubase changed the sampler to be a native inbuilt part of Cubase rather than being a VST plugin.
Till the current version (Cubase 12) you will find this as simply Cubase Sampler. Go to Project, then Add Track, and there you will find Sampler.
This will open up a window which has 4 tabs at the bottom. These are the Mixconsole, Editor, Sampler Controller and Pads sections. For new users, the most confusing are the Editor and the Sampler Control.
Since both these tabs show nearly identical patterns but they have different functions. The Sampler controller is where you can play the sample through MIDI controllers and also carry out some modifications like pitch control.
However, if you want to dive deeper into the controls you will have to make use of Groove Agent. This can be triggered by a small icon with three arrows running through it in the controls, right above the wave.
Through Groove Control, you will launch the sample in a separate track where you can make advanced changes. However, the capabilities of the Groove Control will also vary depending on what kind of Cubase package you are using.
Here is a good video covering the Sampler Track in Cubase:
| Pros | Cons |
| Extensive tunability of sounds | Very limited functionality in any version other than the Pro pack |
| Smooth experience and good performance, thanks to the sampler being a native part of Cubase |
Tracktion Waveform
Waveform starts at $149 for the basic version with the fully loaded version going for $599. If you want to get a bundle with everything that Tracktion has to offer for its DAW along with a bunch of third-party sounds and add-ons, that will cost you $999.
The Multisampler in Waveform does exactly what its name implies. It is a one-stop solution for all your sampling needs, whether you want to create a sound from scratch or just chop up an existing sound and make changes to it as you see fit.
There are two features that are particularly attractive about this sampler. The first is the graphical control you have over the sounds.
Most other samplers will only show you the waveform of the sound and will have knobs and buttons to tweak things like pitch, envelopes, LFOs and the rest.
In Multisampler, you also get a graphical representation of the changes you are making to the sound and you can actually modify the graph to suit your needs.
The other great thing is that this sampler provides MPE support. Therefore, if you are using any controllers that also make use of this mechanism, you can get very detailed with the kind of changes you make to samples and even to specific notes within a sample.
This is certainly a very useful feature for advanced users. Here is a good video covering the Multisampler in Waveform:
| Pros | Cons |
| High-end functionality available in all aspects of sampling | The performance of the DAW may be a bit too basic for some users |
| Graphical input helps you get a different perspective on the sounds you are creating | Some users find the output quality of this DAW insufficient |
| Even the basic version has great functionality |
Reaper
You can buy the discounted license for $60 or the commercial license for $225.
When it comes to sampling, especially for those coming from an MPC background, Reaper can be a bit confusing. However, there is a way around the issue. In fact, two main ways that you should know about.
The first is the most basic and it makes use of the ReaSamplOmatic 5000 plugin that comes with the Reaper package. This is a good sampler but it may not be enough for advanced users.
However, you can still do a lot in terms of MIDI controls, pitch control, reverb, wave modification, and all the other basic things you would expect from a sampler.
If you are looking for a bit more advanced functionality then it is suggested that you go for an aftermarket sampler that can integrate smoothly with Reaper.
There are quite a few available, however, one of the best options is known as MK Slicer. Before you get started with MK Slicer you will need SWS extensions and the Reapack installed.
With that setup, you can get started with MK Slicer which offers you a plethora of options in terms of chopping and slicing as well as sound modulations and sampling effects.
Here is a good video covering basic sampling in Reaper using the inbuilt ReaSamplOmatic 5000. Here is another good video covering the MK Slicer in Reaper.
| Pros | Cons |
| Great price point and offers a ton of value even in the basic package | The experience isn’t as smooth as other platforms until you get used to it |
| Highly customizable and if you can’t find a built-in solution there is most likely an aftermarket solution for it |
Can You Use Any DAW For Sampling?
Technically, yes, you could; realistically, you probably wouldn’t. The reality is that even though all DAWs will offer some way to do at least some kind of sampling, it’s not a black-and-white matter.
Largely, because sampling can be done in a lot of different ways, different sampling plugins can be optimized for different kinds of software, and they can all have very different capabilities.
If you are just looking for basic sampling tasks like cutting, chopping, looping and adding a few basic effects, then yes, most DAWs will be able to do this.
However, if you are looking for advanced features like MPE support, or you need a specific kind of solution like the session view and clip view in Ableton, then you would be hard-pressed to find these things in all DAW samplers.
Moreover, sampling is a process that each producer approaches in a different way. Depending on what you are sampling and what you want to do to the sample, there are different tools and features that will make this process easier.
Rather than grinding away at a sampler that just doesn’t have those features, it would be much easier to work with something that is optimized for that kind of music. If you had to pick a single DAW to sample and sample well, Ableton would be a great choice.
History of Music Sampling
The history of sampling can be broken down into two distinct eras. The first is when the French music technician Pierre Schaeffer developed the first hardware that was able to slice, chop and stitch together samples of existing music.
This was during the 1940s. What Pierre developed at the time was a device that resembled a synthesizer, yet it had the ability to be ‘loaded’ with existing sounds and those sounds could be mapped out onto the keys.
At the time, Pierre didn’t receive much recognition for his creation. On the contrary, it was rather looked down upon as there was essentially no new music being created but rather existing material was being given new packaging.
Later on, in the 1970s when hip-hop was rising in the US, producers found sampling to be a powerful asset. These producers were often struggling financially and needed to do whatever they could to keep production costs down.
Buying sounds, especially from larger labels was out of the question. However, they carried out sampling sounds from others and used them to economically and quickly create their own unique beats.
At the time, paying for used material wasn’t a big concern and it was only till much later that they had to pay for what they had done in the past.
However, this sampling procedure also gave rise to the first MPC machines. These machines with their pads could do everything one would expect from a keyboard/piano.
Also, it could replicate and elongate drums, percussions, stringed instruments, and even random sounds that the artist chose to use. This soon gave rise to a completely new style of music and created the skeleton upon which hip hop and associated genres like RnB were based.
Is Music Sampling Legal?
It depends on how you do it. The process of sampling is not illegal, however, using samples that were created by someone else which you have not been given express permission to use them for your sampling, would be considered illegal.
If you are sampling through any modern DAW, you will notice that there are a number of preloaded sounds in the DAW. These are known as copyright-free sounds, much like copyright-free pictures and videos.
You can sample these however many times you like and in any way you like without any legal implications.
However, if you were to take part of a song created by an artist, that would lead you to two legal problems.
On one hand, you would be facing a copyright infringement claim from the label or the artist that owns that material and secondly you would be facing a copyright strike on the music you have made since it is derived from copyrighted material.
What Is The Best DAW For Sampling For Macbook Users?
If you are using a Macbook, there are a few DAWs that you can consider that are native to that environment. Some of the most popular titles include Garage Band and Apple Logic Pro.
While these aren’t the most advanced or the most technical DAW options, they, however, will work very well for the average and even professional user.
What Is The Best DAW For Sampling For Windows Users?
Windows users have a slight benefit over Macbook users since there are a couple of great options that are available for free. If you want to get started with producing beats without spending any money at all, then consider Audacity and Cakewalk for Windows.
Again, while these are good options, don’t expect them to offer the highest quality or the broadest range of options. If you don’t mind investing a bit of money, the best option you can go for will be Ableton closely followed by FL Studio and Pro Tools.
Ableton and FL Studio will give you plenty of capability and their massive ecosystems ensure that you will have a ton of add-ons that you can consider if you do so need them.
What DAW Do Professionals Use For Sampling?
There are three main contenders in this space and what a producer chooses to use depends highly on the kind of music they are making and their particular style of producing music. The top three options include Ableton, FL Studio and Pro Tools.
Pro Tools is the weapon of choice for producers who are a bit old school and prefer how analogue equipment used to work from the early 90s. Most producers who use Pro Tools are long-time users who have been using it since the platform first started back in 1989.
FL Studio is a very popular option for amateur producers who have now turned pros or are still producing a lot of underground music. The reality is that it is an extremely capable DAW but in the modern day, a lot of producers have their own custom-built solutions.
However, in the early 2000s, FL Studio was extremely popular and continues to be a top choice due to its easy interface and high-quality performance.
Ableton is another very old name that is highly regarded in the industry for its quality and its ability to integrate with a lot of different hardware. Moreover, the diverse functionality of this DAW makes it a fantastic choice no matter what kind of genre you are working in.
Conclusion
Finding the right DAW is about finding what works for your particular style and what you enjoy using the most.
No matter what DAW you get started with, there is going to be a significant learning curve. However, there are numerous online resources that you can refer to.
Moreover, as you grow and develop as a producer, you will start to appreciate the finer details and intricacies of the software as well as its functionalities. From that point on, you can see what works best for you and then start to specialize in the DAW that appeals to you the most.
![HERE’S What Happened to the Soul Singer Al Green [2023 Update]](https://performerlife.com/wp-content/uploads/2023/04/what-happened-to-al-green-211x150.jpg)